Windows 8 and Windows 8.1 appear to be the point that Microsoft gave up getting people to backup their computers. The backup process is a lot less noticeable and is hidden away with a different name in the often inaccessible (unless you know where to look) Control Panel.
Once you find it though, the steps do not differ too much to our Windows 7 backup guide. So before you lose all your data, follow the steps below.
The Backup Drive
A backup drive is needed to store the backup on. Without this there is no backup. Don’t go trying to use your 4GB USB thumb drive you have. It just won’t cut it.
We recommend 1 Terabyte (that is 1000 Gigabytes) for your back up as you will run out quickly if you go too low. 1TB is more than enough to store your files, folders, photos, documents and whatever else so you can restore them when something goes wrong later on.
The Process
The backup process it self is rather simple. Just follow the instructions below…
 Opening Windows 7 File Recovery – Don’t let the name throw you, it is for Windows 8 and 8.1. First move your mouse to the VERY top right of you screen, until you cannot see it any more. Drag it down slowly until you see something similar to the picture. Once you do, click the magnifying glass.
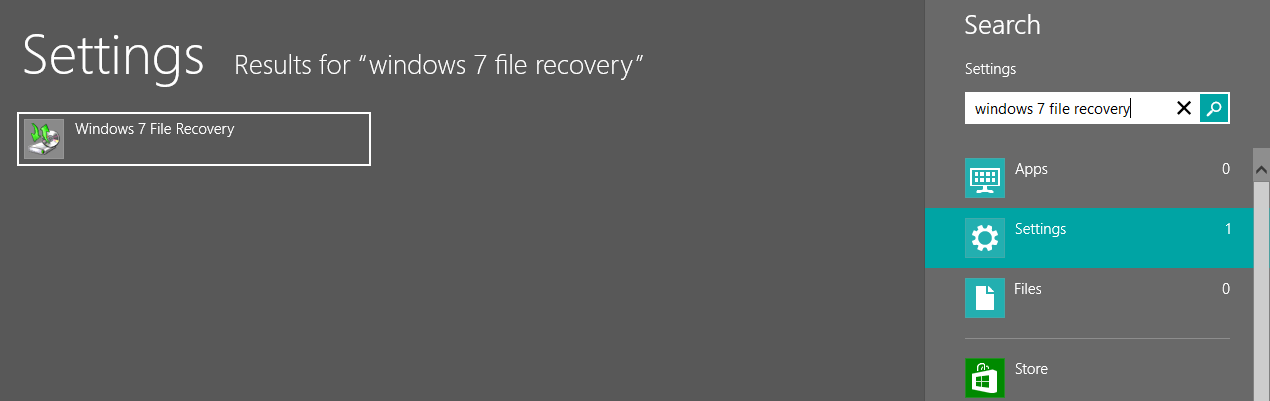 Opening Windows 7 File Recovery – Once you click the magnifying glass, you will be brought to the search screen. Type in “Windows 7 File Recovery”, then click Settings in the list below it. On the left hand side an icon that says “Windows 7 File Recovery” will show up. Click this to go to the backup and recovery panel.
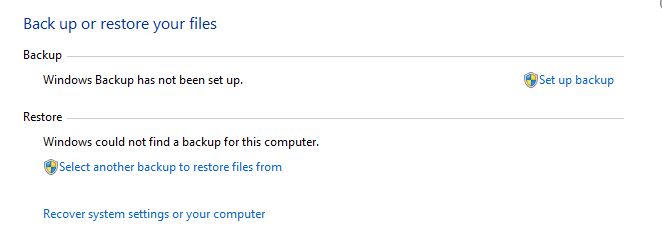
 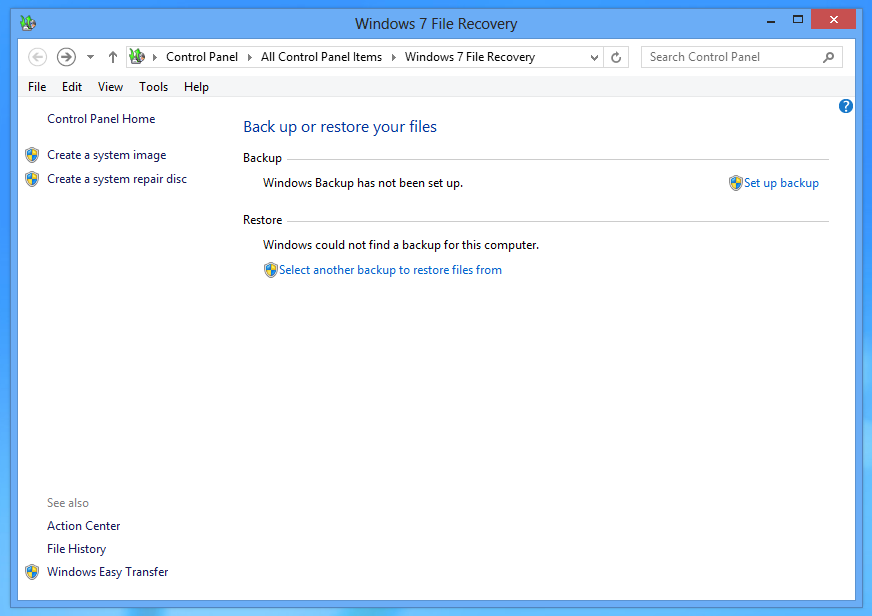 The Backup and Restore screen – The Windows 7 File Recovery panel should now be open on your screen. This screen will show “Windows Backup and not been set up” until we set up a backup. To start this click “Set up Backup” on the right side of the window.
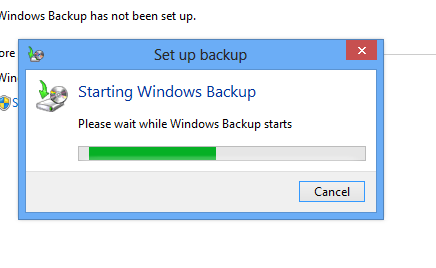 Preparing the Backup – This screen is very simple and requires no input from you. The computer is basically collecting the information it needs to start the backup. This can take any where from 10 seconds to 3 minutes. Don’t worry if it takes a bit longer.
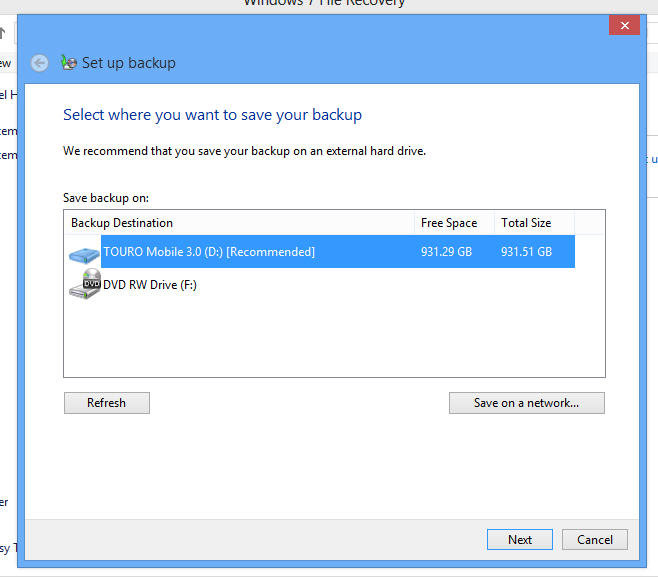 The backup location – This is the part that you needed the external hard drive for. This screen will show the drives attached to your computer. If the external hard drive is not plugged in, connect it and click refresh now. Once your backup drive is showing, click it and then choose Next.
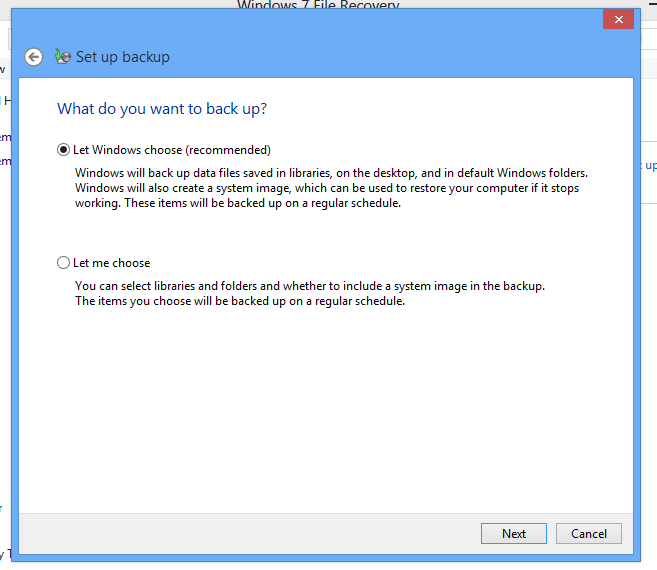 What to backup – Here you choose what you want backed up. Most users keep everything in their Documents or on the Desktop so it is recommended to choose the first option. Once you have chosen click Next.
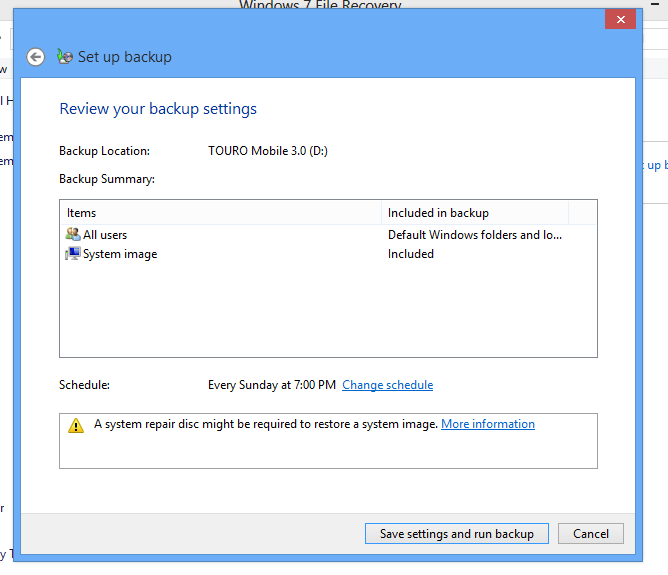 Confirm you choices – Here you can confirm your backup choices. If you chose the recommended like above there is not much to check here. Simply click “Save settings and run backup” button to begin.
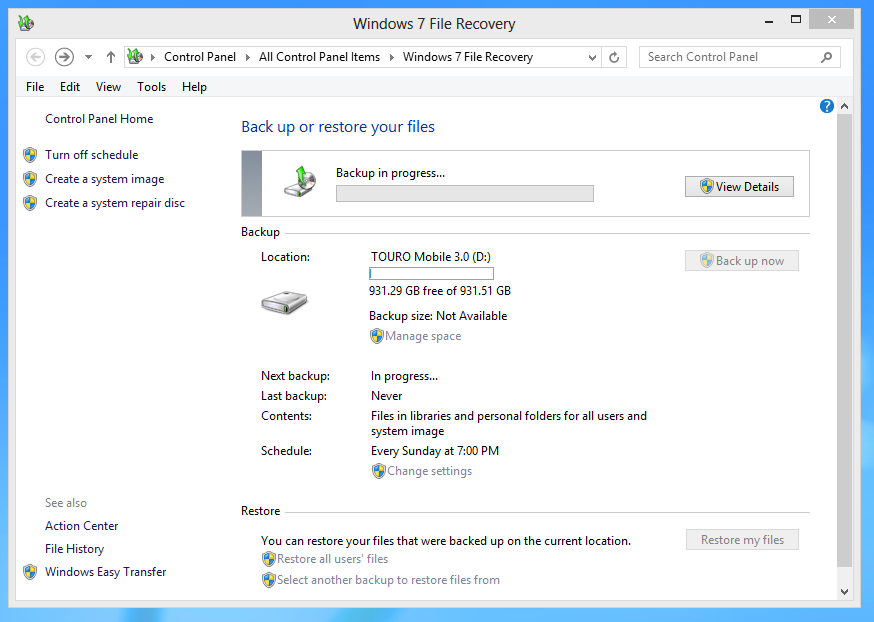 The actual backup – Once you have confirmed your choices you are sent back to the main Windows 7 File Recovery screen and you will see your backup in progress. The second line shows you the external hard drive you have chosen and the space available on it.
 Success! – And that is it. Once the bar at the top reaches 100% the backup is completed. You can now remove the drive from the computer and store it some place safe. The computer will be set to backup again on Sunday at 7:00PM so have your drive ready.
Before you finish
There are a few things to cover before you finish.The backup is done. This does not mean your files are safe to be deleted from the laptop/computer. If you delete them, they are no longer a backup and you will spend a lot of time attempting to get everything back.
Remember: A backup is only a backup when there are 2 or more copies of it.
The recap
Here is a quick list of the steps above to backup your computer.
- Open Windows Search
- Locate the Windows 7 File Recovery panel
- Click Set up Backup on the recovery screen
- Choose your backup drive from the list
- Selected recommended from the backup choices (or choose the second option and pick your own)
- Review the backup and start
Not sure how to do it or after a good back up drive?
If you are having troubles with the steps above or are chasing after a good backup drive, give us a call. We can help you set up the backup or provide you with a stable USB external hard drive to backup to.