Microsoft have many tools available for users to back up ALL their data from their computer without hassle. But the problem is, who knows where to find it?
Well it is not hidden away, in fact, Microsoft warn users constantly about backing up their data. The problem is simply that people just ignore it as another Microsoft pop up. So, how do you back up Windows 7?
It is actually quite simple and can be done in a few minutes.
The Backup Drive
First thing we need to look at is your backup drive. There is no point attempting to back up your computer to a 4GB USB thumb drive. It just isn’t going to be big enough. We recommend at least a 1TB (that is 1000 Gigabytes) external hard drive. This will be more than enough space to back up your entire computer’s files and operating system settings for when something goes wrong down the track.
The Process
Backing up your computer to an external drive is simple. Just follow the instructions below.
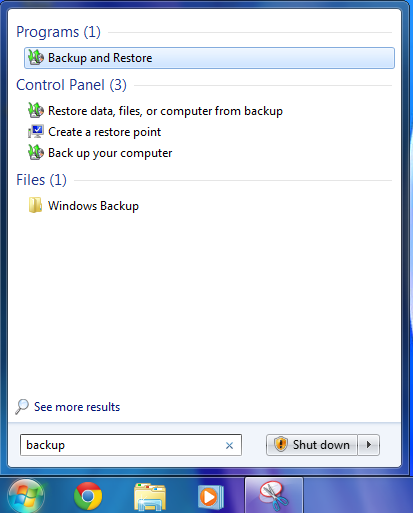 Opening Backup and Restore – To open the Backup and Restore program, all you need to do is click the start “Pearl” in the bottom left corner of your screen. Then under “Search programs and files” simply type in Backup. A list of items will show including the Restore and Backup program. Just click this to start.
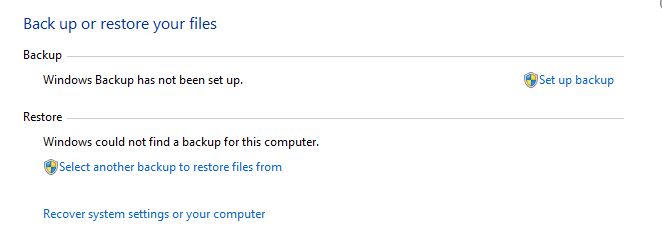
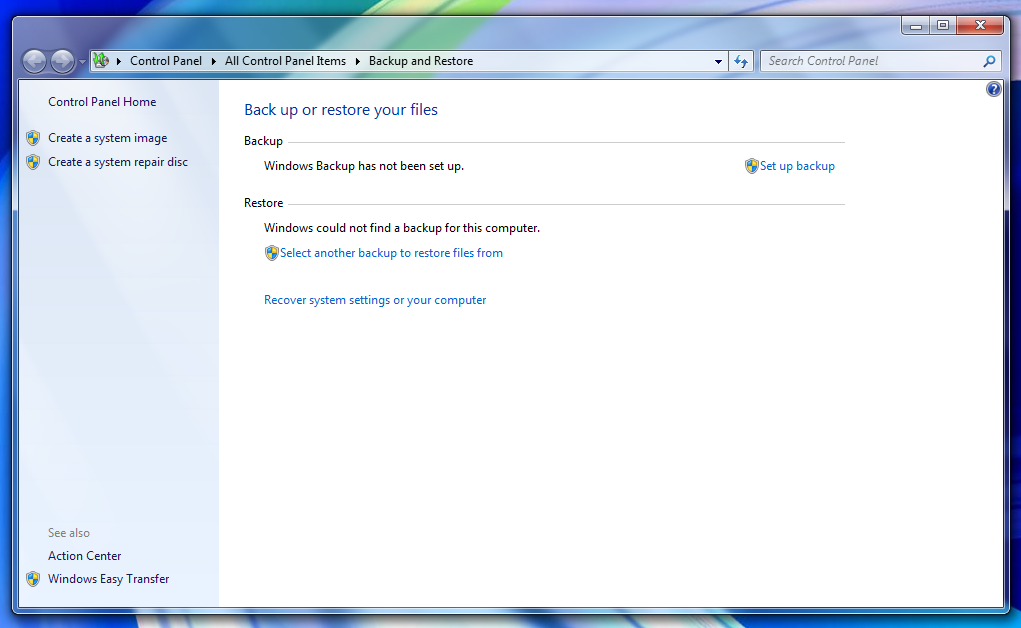 The Backup and Restore screen – Now you will see the default screen for Backup and Restore. Sadly at the moment it will show “Windows Backup and not been set up” on the screen. Lets fix this now. Click on Set up backup in blue on the right side of the Back and Restore window.
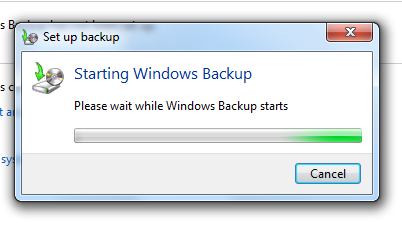 Preparing the backup – The next screen is very simple and requires no input from you. Can take 2-3 minutes to complete depending on how much data is on the computer and how many settings it will need to copy in the backup. In extreme cases this can take a bit of time, but there is nothing to do until the next screen comes up.
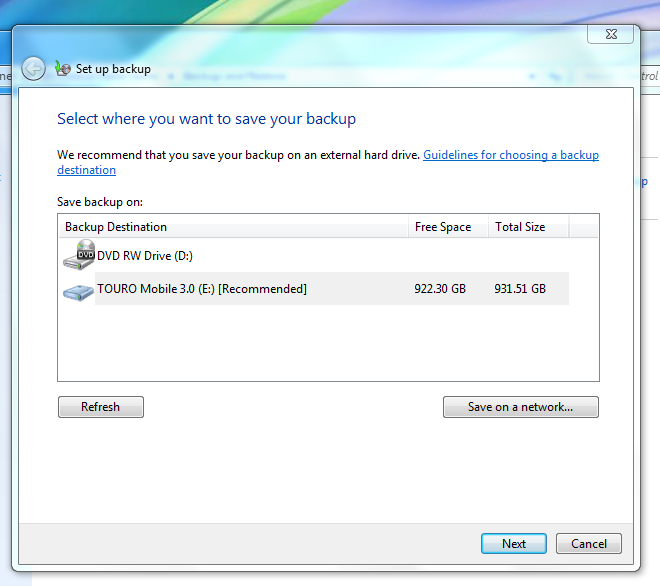 Choose the backup location – Remember how I told you that you would need a large external hard disk drive to back your data up to? Well, this is where you choose it. Make sure the drive is plugged in and select Refresh. If the drive is shown on the screen, simply highlight it and click Next.
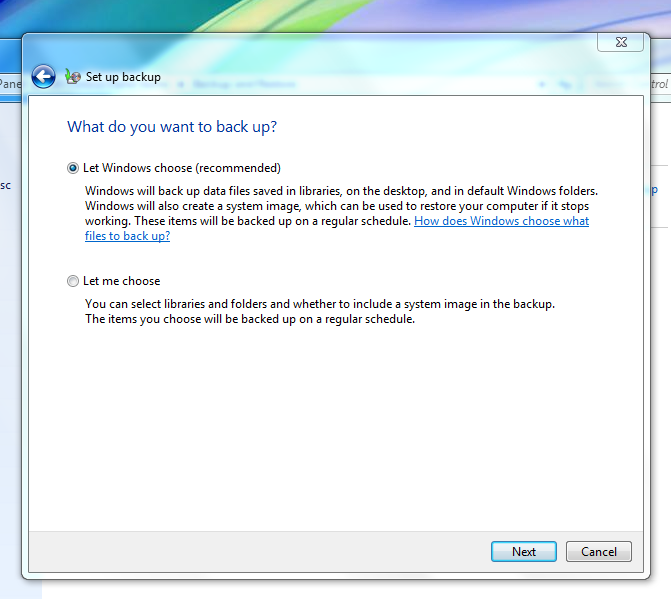 Choose what to back up – This screen lets you pick what you want to back up. Most users will get away with “Let Windows choose (recommended)” and that is what we recommend as well. So make sure the circle next to that option is filled in and then click Next.
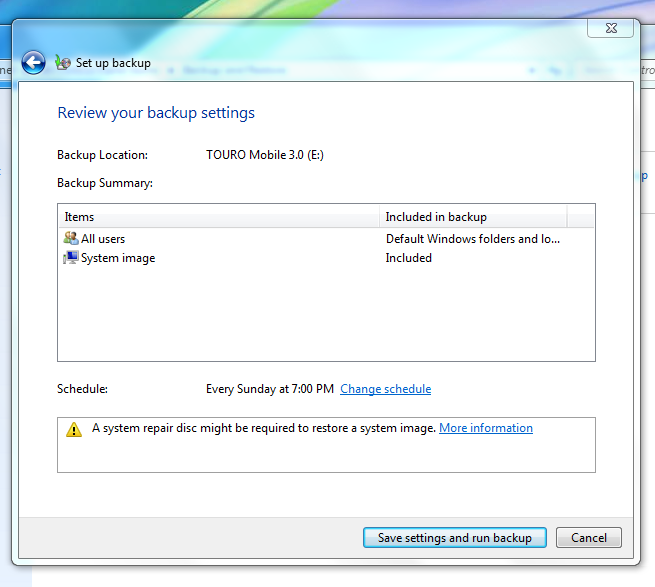 Confirm your backup choices – Now you get to confirm all our backup choices. If you chose the one we and Microsoft recommended above then you won’t really need to worry about this part. It will be telling you it is backing up ALL users and creating a system image. Just click “Save settings and run backup”.
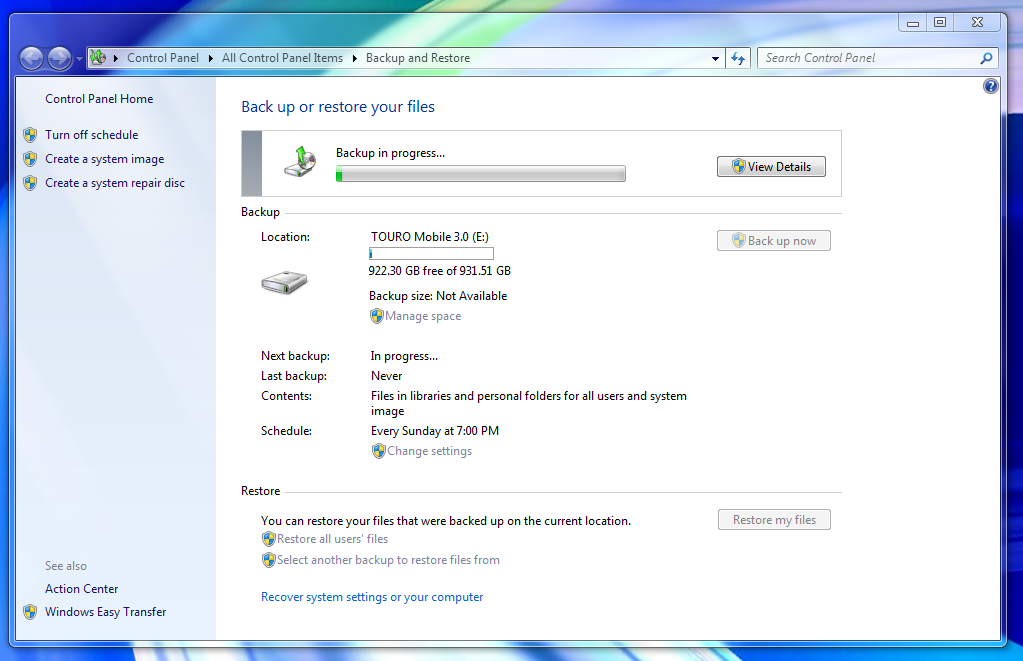 The back up – This is the good part. So you have gone through, made all your choices. Now you get to see if the backup worked or not. This screen will show you a few details. First line is the current back up process. Once that bar gets to the end your back up is done. The second line gives you details on your back up drive. If it gets too full, it’s time for a new drive.
 Success! – And once that progress bar reaches 100%, the back up is finished. You are shown how much space is left on the drive, when the last back up was and when the next one is planned. You can now disconnect your hard drive for safe keeping and plug it in before the next backup. It is as simple as that.
Before you finish
There are a few things to worry about before you go. Your backup is now done. This does not mean you should delete the files from your computer. If you do, you may not be able to restore them from the backup without wiping your computer. Also a back up is only a back up while there are 2 or more copies of something. If it is only on your hard drive and not on your computer, it is no longer a backup.
The recap
Here is just a quick list of the steps taken to back up your computer.
- Open the Backup and Restore panel
- Click Set up Backup on the Backup and Restore screen
- Choose your backup drive from the list
- Choose what to backup or choose the recommended
- Review the backup choices and start the backup
Not sure how to do it or after a good back up drive?
If you are having trouble following the steps above (it happens, don’t worry yourself) or you are after a good external hard drive for your backup, give us a call. We can provide you a stable hard drive and if you bring the laptop/desktop computer in, we are more than happy to set the backup for you.